Saturday 23 January 2016

Smart Lighting - Dimmer Switches

The Philips Hue dimmer switches have arrived. We ordered two of the Wireless Dimming Kits, rather than just the switches themselves, as it was the equivalent of knocking off £5 the price of each bulb.

The first thing we noticed was that the bulbs included in the Dimming Kits are different to the bulbs included in the White Starter Kits. In both cases they are dimmable white LED bulbs, and Philips claim both are the A19/A60 shape, but to my mind the Starter Kit bulbs are closer to a K shape.

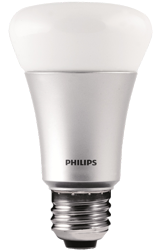
White Starter Kit bulb
Wireless Dimming Kit bulb

As it happens both bulbs fit fine, but I'm intrigued why Philips are producing two different shaped bulbs.

The bulbs in the Wireless Dimming Kits come pre-paired with the dimmer switches themselves. So you could install them without even needing a Bridge. That would make a nice and relatively cheap way into smart lighting, although you wouldn't have the network connectivity until you introduced them to a Bridge.

Pairing the bulbs and switches with the Bridge was also straightforward. The key is to add the switches first. In the mobile app this is via Settings -> My devices, and you'll need to poke the actual switch itself with a pin to get it into pairing mode (orange flashing light). I found that the Bridge couldn't automatically find the two new bulbs, so noted down their serial numbers and used the manual search facility of the mobile app, which worked fine.

To change the link between the switches and the lights or scenes that we wanted to control is configured through the My Devices settings, rather than the lights or scene settings. Our bedside lamp, which has an automatic timer to come on in the morning, now also has a dimmer switch linked to it, so we can turn the lamp off, go back to sleep and be late for work, all without having to find the tablet.

A nice touch with the dimmer switches are the holders. These come with double-sided tape, so can easily be attached to the wall or other surface (you can drill and screw if you to as well). The actual dimmer switches themselves are magnetically attached to the holders. So you can detach the switch and carry it around to wherever you are. In the lounge for example we take the switch from the wall, and when it is movie time we can be extremely lazy and dim the lights without having to get up off of the sofa. There is the risk of the switch disappearing forever down the back of the sofa, but then there's always the mobile app for backup!

Friday 22 January 2016

Honeywell Evohome - Multi-Room Zones - Step-by-Step

I found the evohome Installation Guide uninformative for setting up a multi-room zone. Here's what the Guide says:


Verbose it is not, so here's a step-by-step guide.

The starting point is that there is already a zone set up with one HR92 bound to that zone. First get into the System Settings by pressing and holding the Settings icon for a few seconds. Then select the Zone Settings icon in the top row:


Select the Edit Zone option:


Then select the zone you want to add a radiator or room to. Use the arrow in the bottom right of the Controller to get to the Application Settings option, and select it:


You can then use the Single/Multi Room Zone option to change the type of zone:


Select the Multi Room Zone option, then press the green tick icon in the bottom right hand corner of the Controller: 


Use the arrow in the bottom left of the Controller to get back to the Zone Configuration screen, and the select the Radiator Valve option:


The next step is non-obvious, use the arrow in the bottom right of the Controller to bind an additional HR92 to the current zone:


You'll then be presented with the standard Binding screen, so press and hold the button on the HR92 to get to the Bind function, then a short press of the button on the HR92 to initiate binding to the Controller in the current zone. On the Controller press the green icon in the middle:


When bound successfully you'll get a message on the Controller of the form:


In this case there are 2 HR92s (2 actuators bound) bound to the zone, with bi-directional comms (2-way). You can continue to add more HR92s to the same zone by using the arrow in the bottom left of the Controller, or complete the zone by using the green tick in the bottom right of the Controller.

Note that on the main screen of the Controller it will display the actual temperature from the first HR92 that was bound to the zone. In our lounge and dining room space we bound the lounge radiator to the zone first then the dining room radiator, and so the Controller shows the temperature from the lounge radiator. We've set up the local display on all of the HR92s to show the actual temperature, rather than the setpoint temperature, so I can always take a look at the dining room radiator if I'm interested.

[Whilst the HR92 can tell you on demand what position the valve is actually in, I'm geeky enough to have liked to see the valve position displayed on the HR92 all the time. But that's probably just me!]

Monday 18 January 2016

Honeywell Evohome - Multi-Room Zones


When we installed the Honeywell Evohome central heating control system we fitted four radiators with HR92 temperature regulating valves (TRV). In the other rooms we left the manual TRVs fitted, and lived with the fact that whenever the Evohome system decided that any of the controlled rooms were getting a bit too cold, then the manual TRV rooms would be getting some heating. So recently we ordered another pack of four HR92s from JTM Plumbing, and have fitted them to the remaining radiators. We didn't do this originally purely because of cost, as the HR92s are not cheap, but the ability to add new HR92s to the system means you can fit out the whole house as and when we can afford it.

As our radiators already have the M30x1.5 valves, installation of the HR92s was as easy as before. Binding them to the Controller was also really straight forward. A long press on the Settings icon is required to get into the system settings menu. Then simply add a zone and give it a name, at which point the Controller will sit and wait for the HR92 to start the binding process. (The only thing to remember is to tell the Controller not to use the temperature sensor in the Controller itself for this new zone.) On the HR92 a couple of presses of the button are required to get it into binding mode, and within seconds the Controller was reporting that the two were bound.

We have an open plan L-shaped lounge and dining room, with a radiator in each 'room'. Previously only the lounge radiator had a HR92, but now both of them have HR92s fitted. We started by copying the temperature schedule from the lounge to the dining room, so that both radiators would be trying to keep this space at the same temperature. This is easily accomplished, by going into the schedule for the lounge zone, and using the icon in the bottom right of the Controller display to copy the entire week schedule to the dining room zone.

However this does mean that if we change a schedule or manually change the temperature setpoint in one of the zones, the other zone is unaffected and the two radiators will be trying to keep the one space at two different temperatures. So we set up a multi-room zone, using both the lounge and dining room radiators. The Controller now allows only one temperature setpoint and schedule for the space as a whole, but the two radiators work independently to achieve the desired temperature. This works really well at dealing with the different thermal characteristics of the space. Our lounge is on the south side of the house with big windows and a wood burning stove in it, while the dining room is on the north side of the house with very little natural warming getting in. Certainly when we fire up the stove, the lounge radiator pretty much shuts down as the stove warms up the lounge. We'll have to wait and see how the system deals with sunny days (I hope!).

Friday 8 January 2016

Smart Lighting - Installation

We've started to experiment with smart lighting in the house, in the form of some Philips Hue bulbs and lamps. It is early days, but here's our experiences so far.

The starting point for the wider system was a White Starter Kit, consisting of two white LED bulbs and a bridge. Unfortunately we couldn't get the UK standard B22 bayonet fitting bulbs in a starter kit form, so instead we now have two US/EU standard E27 screw fitting bulbs. This isn't a huge problem as we have a couple of compatible lamp sockets, including the pendant luminaire over the table in the dining room and a bedside table lamp in the bedroom, so the bulbs were installed nice and simply.

The bulbs form a ZigBee wireless mesh network between themselves and the bridge, with the bridge bridging the ZigBee network to our home wired Ethernet LAN. So we plugged the bridge into our broadband router (actually, we've now connected a 4-port Ethernet hub to the router, and have the Honeywell Evohome gateway, the Philips Hue bridge, and an eQ3 HomeMatic gateway connected to the hub) and installed the Hue app on our Android tablet. One of the good things about the starter kit is that the bulbs and bridge are pre-paired, so when everything is powered up and the app is started the lamps are already registered and ready to go.

The standard Philips Hue app is pretty straight forward. We can control the brightness of each lamp manually, or we can set up and activate a 'scene', which is a stored configuration of brightnesses for each lamp. We've created scenes with the dining room light at full brightness for when I'm working from the dining table, and at a lesser brightness for when we're dining. The app also has the possibility to create 'alarms', which are time-based triggers to activate scenes. We've experimented with one that fades up the bedroom lamp in the morning over a 15 minute period, as assistance for the alarm clock.

The major issue that we've identified so far is that it is actually really inconvenient to fire up the tablet to turn a light on or off, and more often than not we've just turned the wall switch off and back on. This activates the Hue bulb's default behaviour, which is to turn on at full brightness. We're obviously not alone in this respect so we have a couple of dimmer switches on order, which should work in parallel with the app, and give us that physical switch on the wall to press.

There's another issue with the Hue app, in that it just seemed to crash randomly while I was trying various options. This turned out to be an issue with Android app permissions, but instead of displaying an alert to the user the app was just crashing. It is easy to resolve though, just go to Settings - Apps - Hue - Permissions and ensure all of the permissions are enabled.

So far we've been looking at white lamps. This is mainly due to cost. The white bulbs are about £15 each, whilst a multi-colour bulb is £50. With 25 ceiling lamps in the house (we've got ten GU10 downlighters in the kitchen alone!), we're not going to be installing multi-colour bulbs this side of a lottery win.

But we have taken a foray into multi-colour with a Hue go lamp. This connects into the ZigBee network, but is battery powered and portable, so we can move it around the house whilst we experiment. At the moment we've got it on the floor in the lounge and are using it to flood a wall with light. Movie nights now have a bit more ambience than before. I've also played with the geo-fencing feature of the Hue app, which can be used to trigger scenes on arrival or departure, so that the go lamp turns off when I leave the house, and back on when I come back. There's an option in the app to only enable this functionality after sunset, so I'm not turning lamps on and off during the day.

The next thing I want to play with is IFTTT integration, and see if I can use the go lamp for weather updates, email notifications, and more!